Configuring Facebook Pixel Events For Your Domains
Configuring Facebook pixel events was pretty much the most requested lesson I’ve had so far.
What with the recent changes to Facebook Ads due to iOS 14 updates, there was a lot going on.
Facebook had to change things around and they weren’t very happy about it.
As a marketer myself and a long term user of Facebook ads (6+ years now), I have to say I wasn’t happy about it either.
Just as things are going along working fine, a spanner gets thrown in the works and it’s all change.
Ding ding.
Do not pass go. Do not collect $200.
Luckily….
It’s not that complicated once you know how.
Please do watch my YouTube on configuring Facebook pixel events – this may be the easiest way for you to see how it all works.
Or – if you prefer to follow along and read, do stay on this page and read this entire blog post.
I’ll do my best to screenshot every step for you.
If you don’t have a domain yet – you need to hop on over to NameCheap and get one.
Instructions on how to do all of this are in this YouTube and this blogpost.
Next, you need to make sure your domain is verified – both with Shine-On and Facebook.
Currently Shine-On are taking a few days to get domains verified, but this step absolutely needs to be completed first.
Verifying your domain with Facebook is also covered in this YouTube and this blogpost .
Again, before moving on with configuring Facebook pixel events make sure this is completed.
Domain verified with Shine-On & Facebook?
Good! Let’s get started.
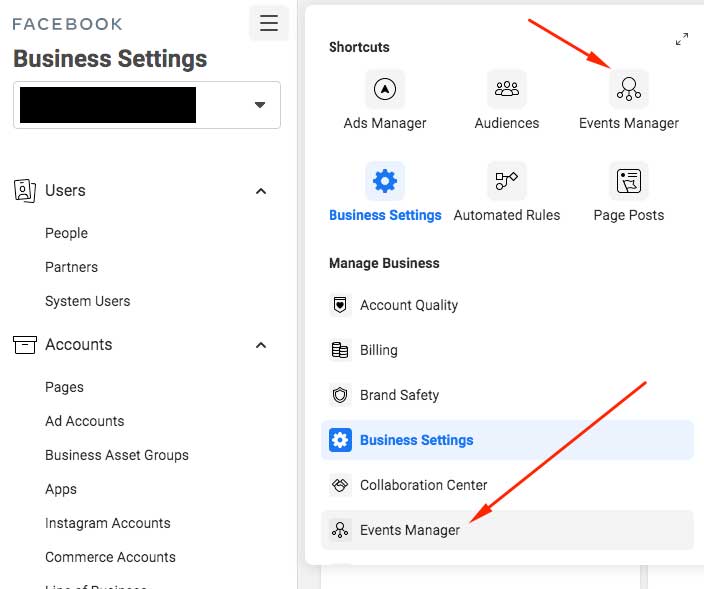
Head on over to Facebook ads manager, hit the mega menu and browse to Events Manager.
On the next page you’ll see Data Sources top left. (your pixel, or pixels if you have more than one)
I’ve blurred some of this info out on my screenshot as I have multiple pixels, but your page should look similar.
Even if it just has one pixel up top on the left.
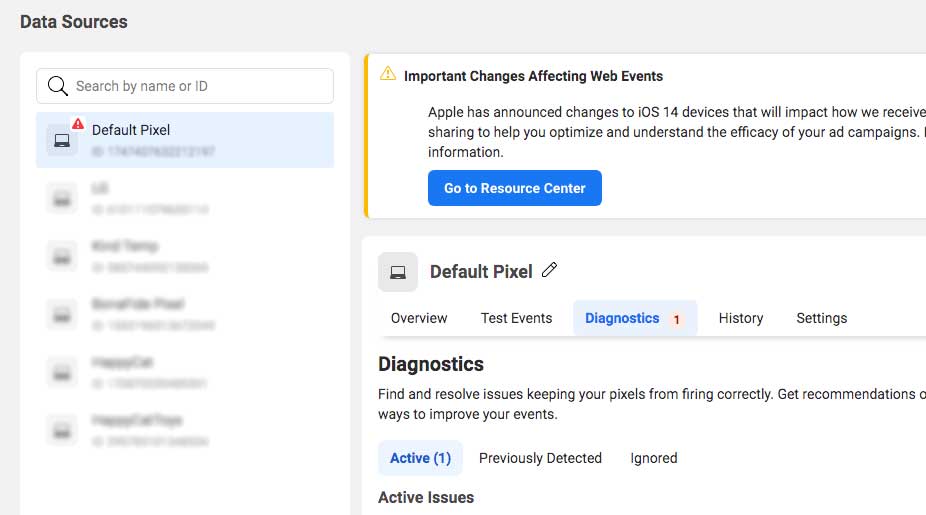
Make sure your pixel is selected, then on the right click Overview.
Underneath that, choose Aggregated Event Measurement.
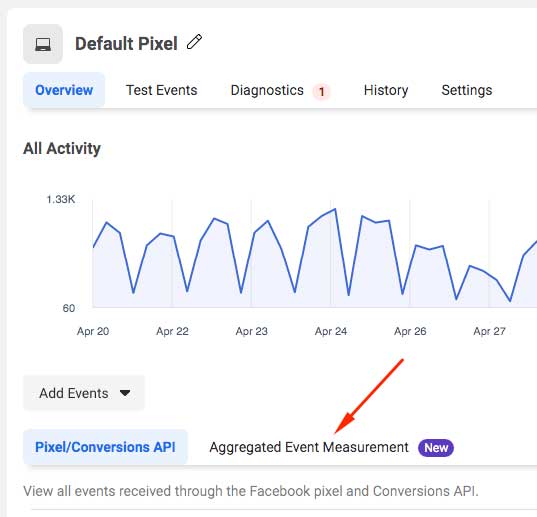
If you haven’t set this up already, you should see a blue button that says Configure Web Events.
Click it, then look for your domain on the next screen on the left.
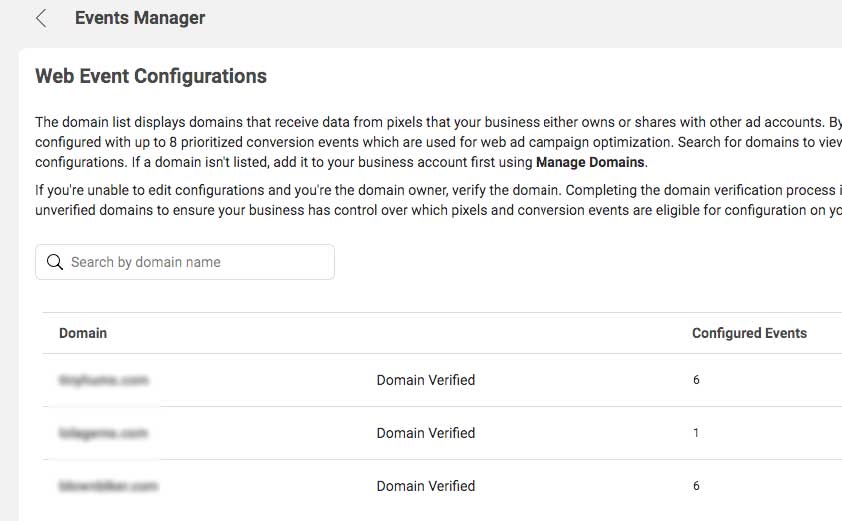
Again, I’ve blurred mine out, but yours should be on the left under where it says Domain and it should also be verified!
Click the domain and choose Manage Events.

You’ll get a warning window pop up saying ‘Edit these events?’.
Choose Edit.
On the next screen is where you actually edit and add in your pixel events.
Now we’re getting to the meat and two veg!
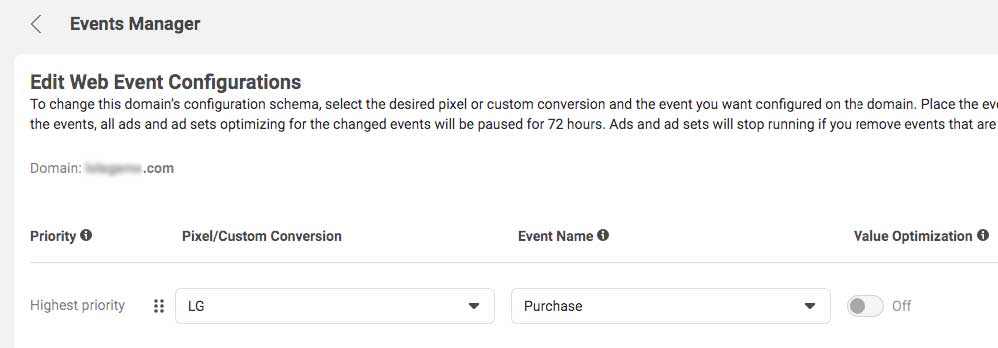
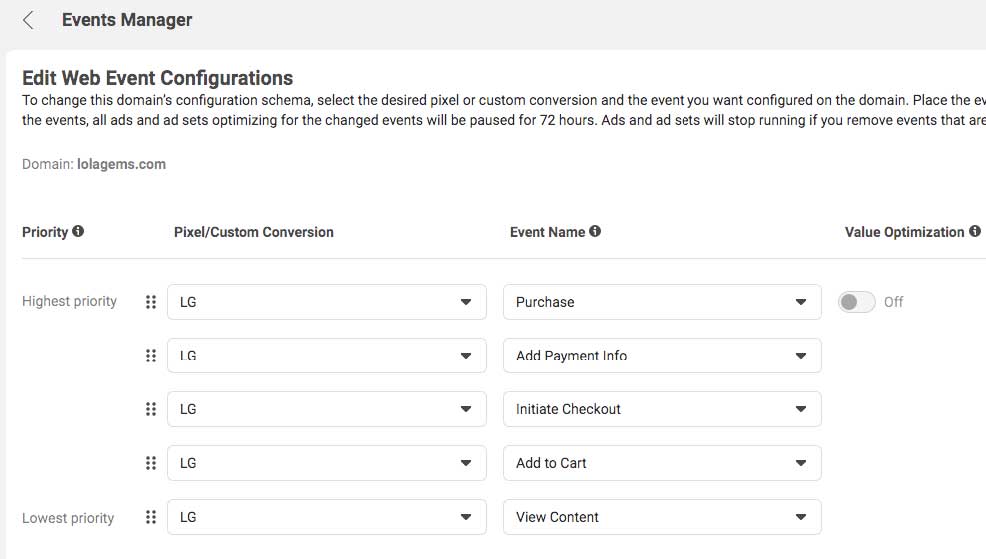
We need to add in and move down our events in order of priority.
The order is as follows :
Purchase, Add Payment Info, Initiate Checkout, Add To Cart, View Content.
So – looking at the above screenshot, for the first event (highest priority – we want sales) make sure your pixel is selected then choose Purchase in the Event Name drop down.
Then, click Add Event over on the left.

This will save our first web event and the second will then appear underneath it.
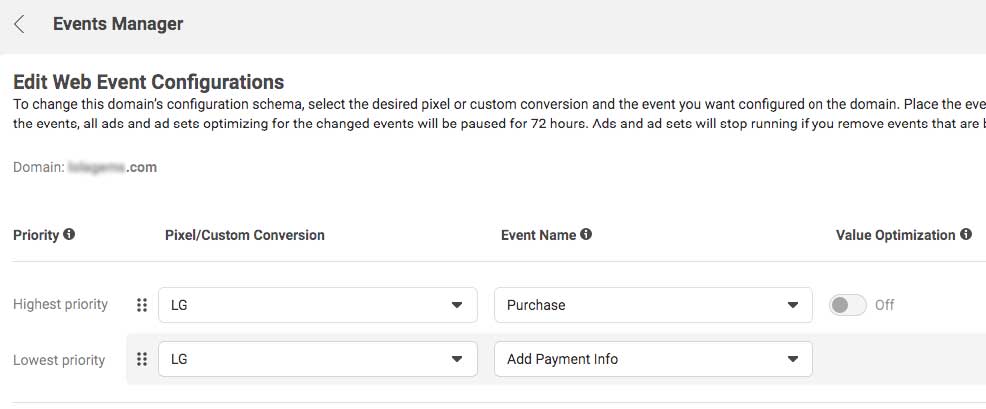
Just like before, select your pixel, then choose Add Payment Info from the Event Name dropdown menu, and click ‘Add Event‘ over on the right.
A third web event will then appear underneath the first two.
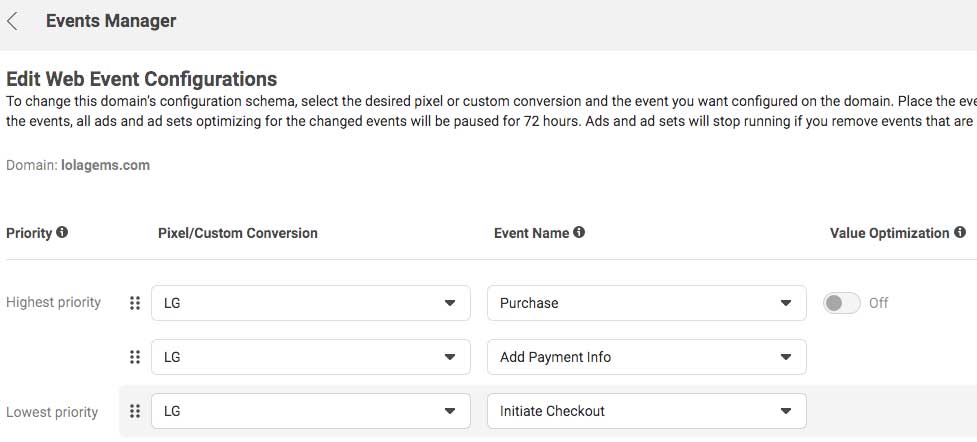
This time set the Event Name as Initiate Checkout.
And, as I listed above, work down the events adding them in one at a time…
Purchase, Add Payment Info, Initiate Checkout, Add To Cart, View Content.
Guys… you’re nearly there. Keep going.
This right here is how to configure Facebook pixel events for your Shine-On domain, or in fact any domain you wish to use with Facebook ads.
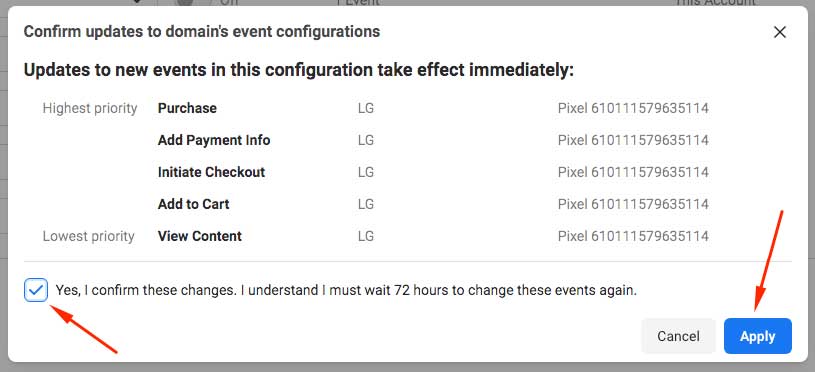
Once all five events are in as above, click the blue Submit button over on the bottom right.
You’ll get one last pop up window that you have to confirm as follows (make sure you check the box!)
And that’s it folks.
You have successfully configured your Facebook pixel events for your custom domain.
Easy once you know how of course – but that’s what these blogposts, and my YouTube videos are all about.
Hopefully this will have helped someone out there somewhere who is struggling over setting this up.
Looking at the amount of emails, messages, DMs and comments I had about this issue, it seems like that was/is quite a lot of you.
So – as usual I’ve made a YouTube about this if you would prefer to watch me setting this up live.
Feel free to go watch that and leave a like, comment or share. I’d very much appreciate it.
Other parts in this series :
Part 1 – Part 2 – Part 3 – Part 4 – Part 5 – Part 6
Part 7 – Part 8 – Part 9 – Part 10 – Part 11 – Part 12
Ok – part 13 is uploaded and ready now, if you’re interested go take a look here.
