In this post I walk thru how you create a Facebook custom audience from a list of Shopify customers.
Why would you want to do this? Well, several reasons :
- Facebook doesn’t always ‘catch’ all of your customers (purchases). This leads to incorrectly sized custom audiences.
- Using this method you can upload custom audiences based on single products, multiple products, or even collections (niches)
- You can combine custom audiences together into one list, then build lookalikes based on that
- It’s another method of doing something, which is always good to learn in my eyes
In the example on my YouTube video, despite having sold over 1700 units of a hummingbird based product, the Facebook custom audience I have built for purchasers is still showing less than 1000 in size.
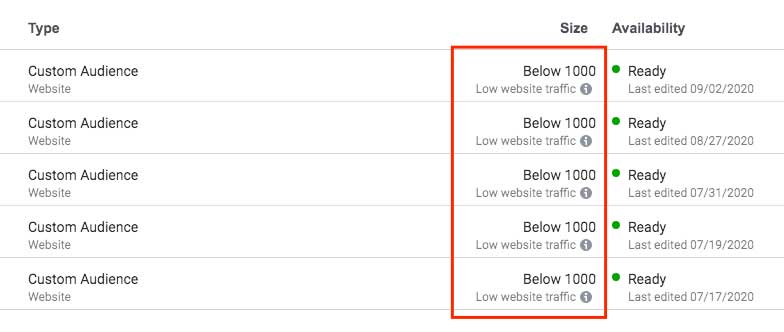
I have no idea why this is, but there is a workaround – and I’m going to show you how!
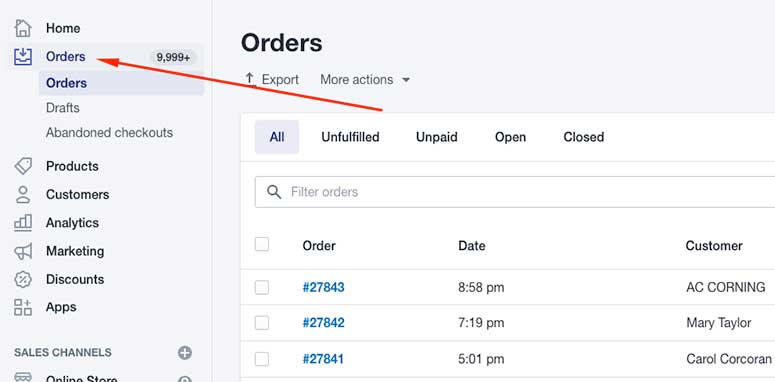
So for this let’s get into our Shopify customer list, or ‘Orders’ in your Shopify admin :
Next, we need to filter orders by product. To do this just type the title of the product, or part of it, into the ‘Filter orders’ box.
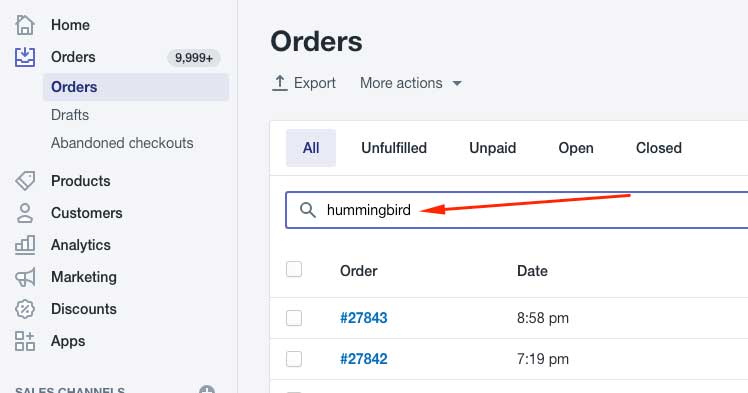
Note : I only have one hummingbird product on my store.
If you have more than one product on yours, make sure to enter a unique value (term) in the ‘filter orders’ box so the correct list of customers pops up.
examples : hummingbird poster, hummingbird earrings, hummingbird necklace.
Once your list of customers is filtered, we then need to export this list as a .csv file.
Click ‘Export’ right under where it says Orders.
Then, choose these options in the box that pops up :
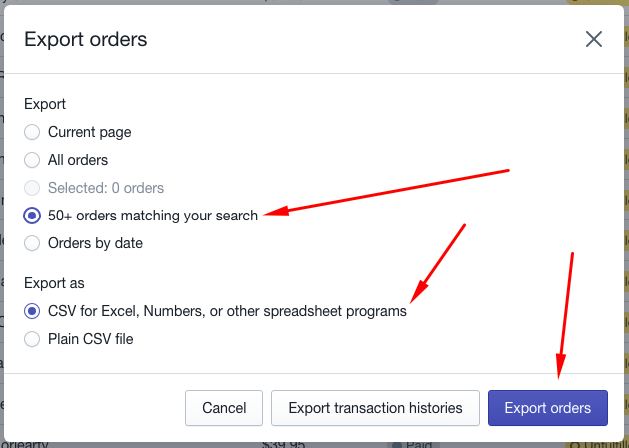
Click the purple ‘Export orders’ button and a .csv file will be emailed to your Shopify email address.
Depending on the size of your list, it may take a minute or two.
When you receive the file, open it up.
Csv files will open in Excel if you have that installed, otherwise you can use Google sheets.
I have Excel on my computer, so this is what the file looks like when you open it up…
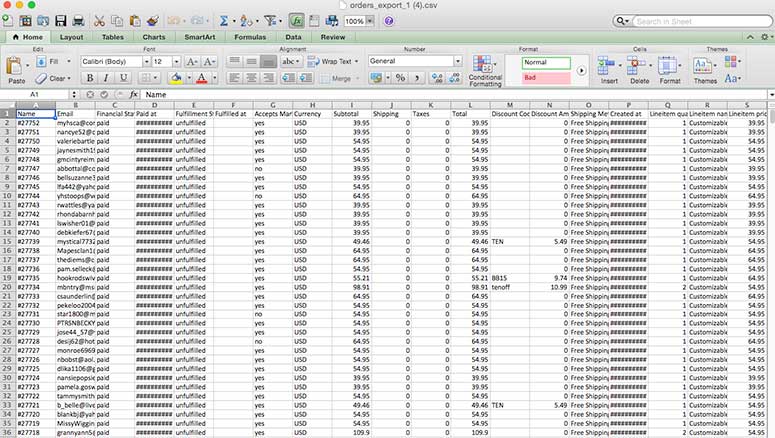
There’s a lot of info in there, but all we’re interested in is the email addresses – that you can see in column B.
So, highlight this column by clicking the top of the column :
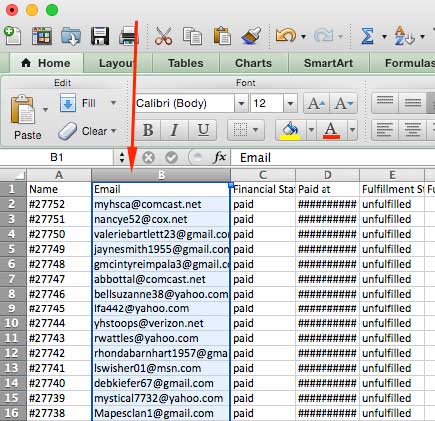
Then, copy this (Ctrl+C on PC, CMD+C on a mac) and paste it into a new Excel spreadsheet (or Google sheets, if you’re using that)
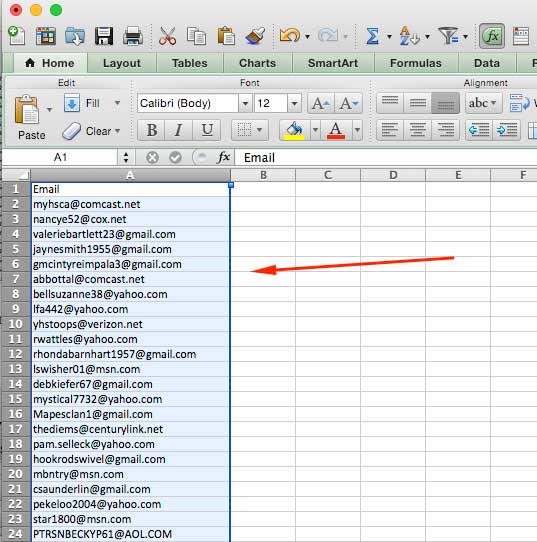
Next, highlight row 1 (where it says ‘Email’) and delete it. You should be left with just a list of the email addresses at this point :
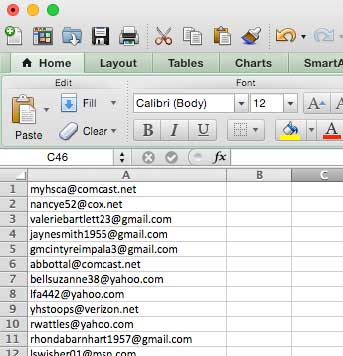
Finally, we need to remove any duplicate email addresses from our master list. Click the data tab up top :

Then the ‘Remove Duplicates’ icon :

Click the ‘Remove Duplicates’ button and you’re good to go. One nice fresh list of customer email addresses ready to go.
We then need to export this in a format that can be uploaded to Facebook Audiences.
Choose File/Save as from your Excel menu, and you’ll get a menu box open with some options.
- First, choose a file name for your .csv file.
- Important! Make sure you select the correct Format. You need to select Comma Separated Values (.csv) from this menu. If you don’t select this the whole process detailed here will not work. Facebook won’t be able to read the file when you upload it.

Let me say that again. From the Format drop down menu at the bottom make sure you select Comma Separated Values (.csv).
Otherwise when you create a Facebook custom audience from a list of Shopify customers, it won’t work correctly.
Export your .csv file, then head over to Facebook Audiences in your Ads Manager.
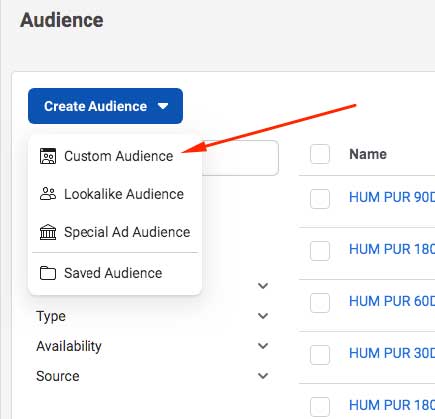
Click ‘Create Audience’, then choose Custom Audience.
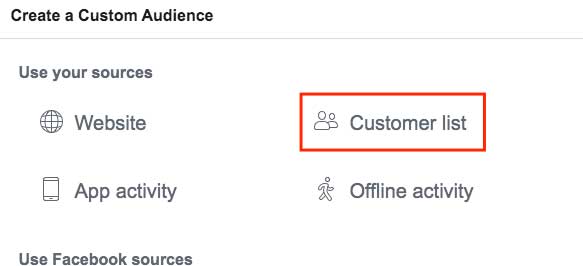
Next, choose ‘Customer List’
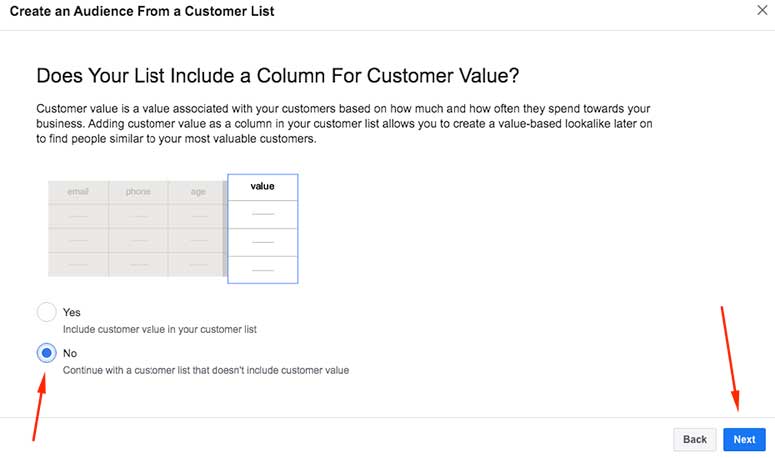
On the first screen, just click Next, then on screen 2, choose the ‘No’ option, and click Next again.
Next screen is where you upload your .csv file. Either drag it onto the window at the top, or click and locate it on your computer :
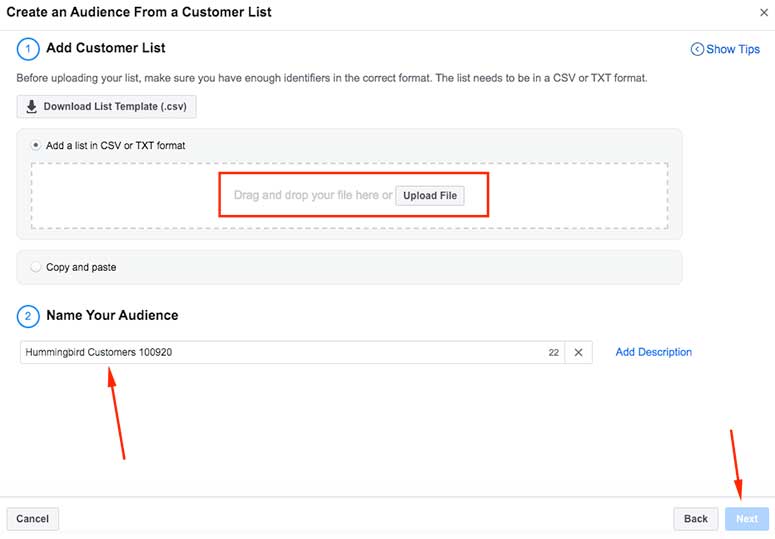
Name your audience – call it something sensible so you know what it is in Facebook. Here I’ve called it Hummingbird Customers 100920 (today’s date). After you’ve done this, click ‘Next’.
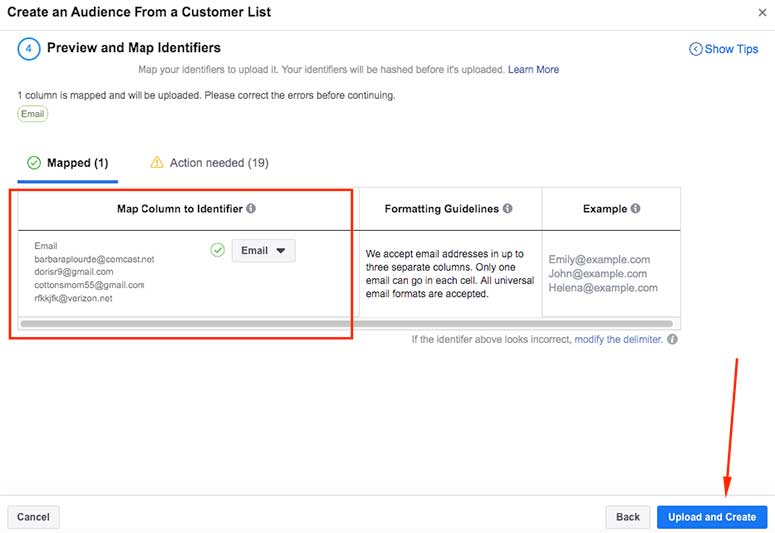
On the next screen, you should see something like below. If you’ve uploaded your .csv in the correct format Facebook will choose to map them correctly – you’ll get a green tick in a circle and ‘Email’ showing in the little drop down menu.
All good to go? Click ‘Upload and Create’ at the bottom…
Depending on the size of your customer list, Facebook will tick along for a second as it maps everything, then you will see the success screen like so :

And that’s it – you’re done! Now you should see your new custom audience appear in your Facebook Audiences :

Important – Facebook will take a while to populate the list before you can start using it. This is what mine looks like immediately after uploading :
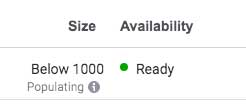
You can see from an earlier screenshot that I uploaded 1337 customers. Like I said, Facebook needs a bit of time while it maps all the entries to people’s emails inside Facebook.
Refresh the page after an hour or two and you’ll see the correct amount registered. Once that number is showing over 1000 – you can start building lookalike audiences to target even more customers with your Facebook campaigns.
I’ll get onto how you do this in a future post.
Now, if you want to watch my YouTube video on how to do the above – here it is :
See you in the next one guys!

